Are you prepared to indulge in perfectly prepared rice consistently? If so, the Aroma Rice Maker is an outstanding addition to your kitchen. This convenient device eliminates the uncertainty involved in rice cooking, letting you focus on other food preparation chores. This tutorial will provide all the information you need to proficiently use and care for your Aroma Rice Maker.
Unboxing the Aroma Rice Maker
When you first receive your Aroma Rice Maker, unbox it carefully and make sure that all parts are included. Inside the package, you should find the rice maker, an inner pot, a rice measuring cup, a serving spatula, and an instruction manual. Before using the rice maker for the first time, wash the inner pot and spatula with soap and water, rinse them thoroughly, and dry them completely.
Once you have washed and dried the inner pot and spatula, you can start using your Aroma Rice Maker. To make perfect rice every time, use the rice measuring cup provided to measure the amount of rice you need. Then, add the appropriate amount of water according to the instructions in the manual. The rice maker will automatically cook the rice and switch to the keep-warm mode when it’s done.
Aside from cooking rice, the Aroma Rice Maker can also be used to steam vegetables, meat, and fish. To do this, simply place the food in the inner pot and add water to the appropriate level. Then, select the steam function on the rice maker and let it do its job. This versatile appliance is a great addition to any kitchen and can save you time and effort in meal preparation.
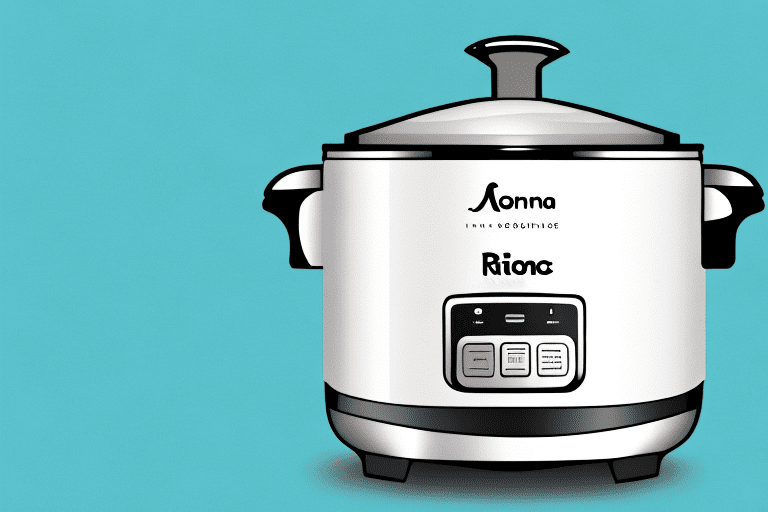
Understanding the Aroma Rice Maker Controls
The Aroma Rice Maker comes equipped with several controls that may seem daunting at first, but with a little practice, you’ll be cooking rice like a pro. The control panel typically features buttons for selecting the cooking mode, setting the timer, adjusting the temperature, and more. You’ll also see indicator lights that indicate when the rice is cooking and when it’s done.
One important thing to note is that the cooking mode you select will affect the texture and consistency of the rice. For example, the “white rice” mode will cook the rice differently than the “brown rice” mode. It’s important to read the instructions carefully and select the appropriate mode for the type of rice you’re cooking.
Another useful feature of the Aroma Rice Maker is the ability to keep the rice warm after it’s done cooking. This is especially helpful if you’re not ready to serve the rice right away, or if you’re cooking for a large group and need to keep the rice warm for an extended period of time. Simply press the “keep warm” button after the rice is done cooking, and it will stay warm until you’re ready to serve.
How to Measure Rice and Water for Aroma Rice Maker
To cook perfect rice every time, it’s essential to measure the rice and water in the correct proportions. A good rule of thumb is to use one cup of rice for every two cups of water. The included rice measuring cup should be used to measure both the rice and water. Rinse the rice thoroughly before cooking to remove excess starches that can cause the rice to become sticky.
It’s important to note that the type of rice being used can also affect the amount of water needed. For example, brown rice typically requires more water than white rice. It’s always a good idea to consult the instructions that came with your Aroma Rice Maker for specific measurements based on the type of rice you are using.
Another tip for perfectly cooked rice is to let it rest for a few minutes after cooking. This allows the rice to absorb any remaining water and become fluffy. Fluff the rice with a fork before serving to prevent clumping.
Choosing the Right Type of Rice for Aroma Rice Maker
The Aroma Rice Maker is capable of cooking a variety of rice types, including white, brown, jasmine, and basmati. Each type of rice has unique characteristics that require different cooking times and water ratios. To get the best results, refer to the instruction manual for specific cooking instructions for each rice type.
It is important to note that the quality of the rice also plays a role in the final outcome of the cooked rice. Using high-quality rice will result in better texture and flavor. Additionally, rinsing the rice before cooking can help remove excess starch and improve the overall quality of the cooked rice. Experiment with different types and brands of rice to find the perfect match for your taste buds.
Using the Delay Timer Function on Aroma Rice Maker
The Aroma Rice Maker is equipped with a delay timer function, which allows you to set the rice maker to start cooking at a later time. This feature is incredibly handy if you want to have rice ready when you get home from work or wake up to fresh rice in the morning. To use this feature, simply set the timer according to the instructions in the manual.
It is important to note that the delay timer function should only be used with dry ingredients. If you are planning to add any vegetables or meats to your rice, it is best to add them in after the cooking process has started. This will ensure that they are cooked properly and do not become overcooked or mushy. Additionally, make sure to use the correct amount of water and rice according to the instructions provided with the rice maker to ensure the best results.
Cooking Different Types of Rice with Aroma Rice Maker
The Aroma Rice Maker allows you to cook a variety of rice types, including white, brown, jasmine, and basmati. Each of these types of rice requires a different water-to-rice ratio and cooking time. For example, brown rice requires more water and a longer cooking time than white rice. Follow the instructions in the manual to get the best results for each type of rice.
Aside from the different water-to-rice ratio and cooking time, the Aroma Rice Maker also has different settings for each type of rice. For instance, the jasmine rice setting has a shorter cooking time and lower temperature compared to the brown rice setting. It is important to select the correct setting to ensure that the rice is cooked perfectly.
Moreover, the Aroma Rice Maker can also be used to cook other grains such as quinoa, couscous, and bulgur. However, the water-to-grain ratio and cooking time may vary depending on the type of grain. It is recommended to consult the manual or do some research to get the best results when cooking other grains with the Aroma Rice Maker.
How to Clean and Maintain your Aroma Rice Maker
To ensure the longevity of your Aroma Rice Maker, it’s essential to clean and maintain it regularly. After each use, allow the rice maker to cool down, then remove the inner pot and wash it with soap and water. Use a non-abrasive cleaning pad to scrub away any residual rice that may be stuck to the inside of the pot. Dry the pot thoroughly before storing it.
In addition to cleaning the inner pot, it’s also important to clean the exterior of the rice maker. Use a damp cloth to wipe down the outside of the machine, being careful not to get any water inside the device. If there are any stubborn stains or marks on the exterior, use a mild cleaning solution and a soft cloth to gently remove them.
Regular maintenance of your Aroma Rice Maker also includes descaling the machine. Over time, mineral deposits can build up inside the rice maker, which can affect its performance. To descale the machine, mix equal parts of water and white vinegar and pour the solution into the water reservoir. Run the rice maker through a complete cycle, then rinse the machine thoroughly with water. Repeat this process every few months to keep your Aroma Rice Maker in top condition.
Troubleshooting Common Issues with Aroma Rice Maker
While the Aroma Rice Maker is an excellent appliance, various issues may arise during use. These issues include undercooked or overcooked rice, rice that sticks to the bottom of the pot, and water boiling over. Thankfully, most of these issues can be resolved by adjusting the water-to-rice ratio, ensuring that the pot is correctly seated, and cleaning the appliance regularly.
However, if you have tried these solutions and are still experiencing issues, it may be time to replace the inner pot or heating element. It is also important to note that using the correct type of rice and measuring accurately can greatly improve the performance of your Aroma Rice Maker. By following these tips and troubleshooting steps, you can ensure that your appliance continues to produce perfectly cooked rice every time.
Tips and Tricks for Cooking Perfect Rice with Aroma Rice Maker
Here are some tips and tricks to help you get the best results when cooking rice with your Aroma Rice Maker:
- Always measure the rice and water precisely for the best results.
- Rinse the rice thoroughly before cooking to remove excess starches.
- Try adding ingredients such as vegetables or herbs to the rice for an added flavor boost.
- Experiment with different types of rice to find your favorite.
- Clean the pot regularly to prevent leftover rice from sticking to the bottom.
By following these tips, you’ll be well on your way to cooking perfect rice every time with your Aroma Rice Maker.
With these instructions, you now have all the information you need to make the most of your Aroma Rice Maker. Follow the instructions in this guide, and you’ll be able to enjoy perfectly cooked rice every time with minimal effort.
Another important tip to keep in mind when cooking rice with your Aroma Rice Maker is to let the rice sit for a few minutes after it’s done cooking. This allows the rice to absorb any remaining moisture and ensures that it’s fully cooked and fluffy. Additionally, if you’re cooking brown rice, you may need to add a bit more water and increase the cooking time to ensure that it’s fully cooked. By following these additional tips, you’ll be able to achieve even better results with your Aroma Rice Maker.