Making Yogurt in a Rice Cooker: A Step-by-Step Guide
Creating yogurt in a rice cooker is a delightful journey that transforms simple ingredients into a creamy, tangy delight. Whether you're a novice in the kitchen or an experienced chef looking to explore unconventional methods, this detailed guide will walk you through the process, ensuring a successful yogurt-making adventure every time.
For Beginners: Getting Started with Yogurt Making
Ingredients You'll Need
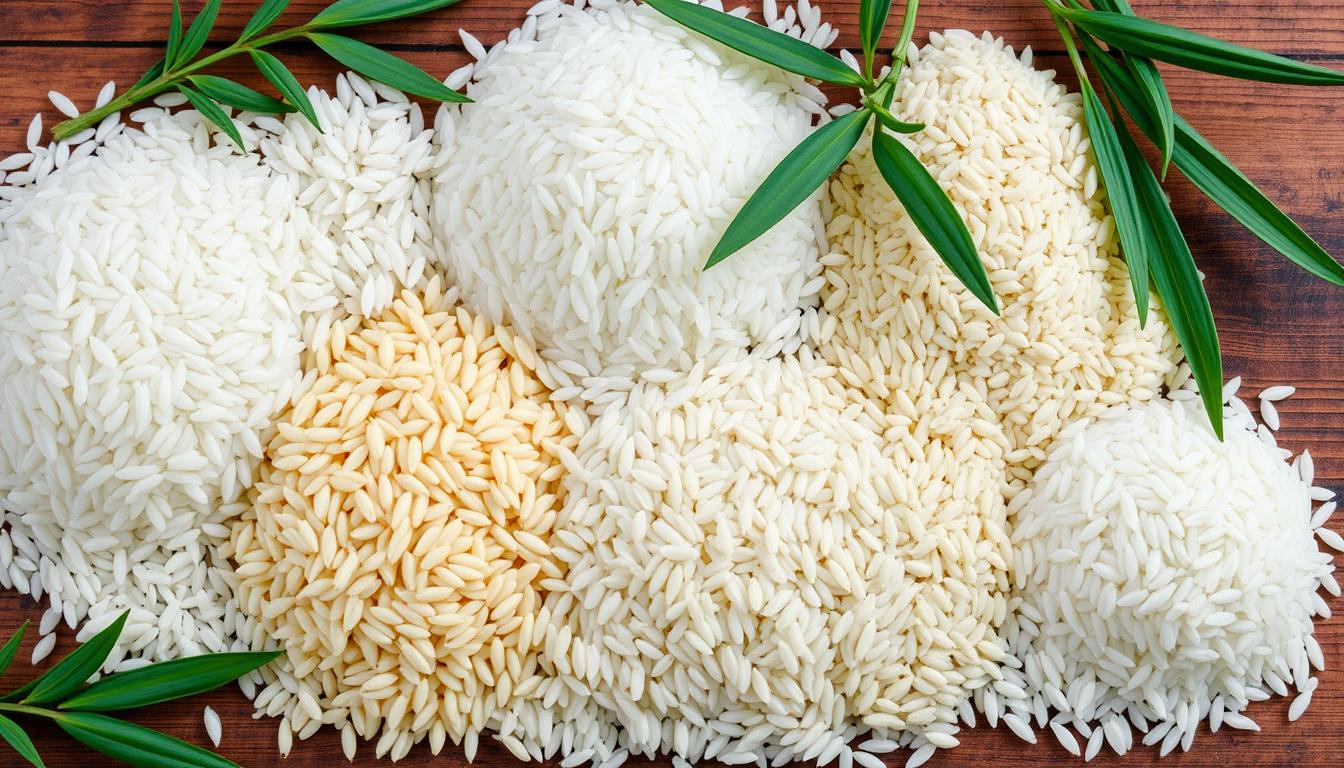
- Milk: Opt for high-quality milk, whether it's whole, 2%, or even plant-based alternatives like almond or soy milk.
- Yogurt Starter: This can be store-bought plain yogurt with live active cultures or a yogurt starter culture packet.
- Optional Add-Ins: Honey, vanilla extract, or fresh fruit for flavoring.
Preparing Your Rice Cooker
- Cleanliness: Ensure your rice cooker is thoroughly cleaned to prevent any unwanted bacteria from affecting the yogurt.
- Temperature Setting: Most rice cookers have a 'Warm' setting that maintains a consistent low heat, ideal for incubating yogurt.
Making the Yogurt
- Heating the Milk: Pour the milk into the rice cooker and heat it until it reaches around 180°F (82°C) to kill any unwanted bacteria.
- Cooling the Milk: Let the milk cool to around 110°F (43°C) before adding the yogurt starter.
- Adding the Starter: Mix a small amount of warm milk with the yogurt starter in a separate bowl before incorporating it into the rest of the milk in the rice cooker.
For Intermediate Yogurt Enthusiasts: Elevating Your Yogurt Game
Incubation Process
- Incubation Time: Set the rice cooker to the 'Warm' setting and let the yogurt culture for 6-8 hours for a tangy flavor.
- Checking Consistency: After the incubation period, check the consistency of the yogurt. If it's too runny, you can strain it through a cheesecloth to thicken it.
Flavoring Your Yogurt
- Sweeteners: Add honey, maple syrup, or sugar to sweeten the yogurt to your preference.
- Mix-Ins: Experiment with fresh fruit, granola, or nuts to add texture and flavor to your homemade yogurt.
Storing Your Yogurt
- Refrigeration: Once the yogurt is at your desired consistency, transfer it to a container with a tight lid and refrigerate it for at least 4 hours before serving.
- Shelf Life: Homemade yogurt can typically last up to 2 weeks in the refrigerator.
For Advanced Yogurt Artisans: Fine-Tuning Your Craft
Experimenting with Milk Types
- Fat Content: Try using different milk varieties like whole milk for a creamier texture or skim milk for a lighter option.
- Non-Dairy Alternatives: Explore making yogurt with almond milk, coconut milk, or soy milk for a unique flavor profile.
Customizing Your Yogurt
- Probiotic Boost: Add probiotic capsules to enhance the health benefits of your homemade yogurt.
- Greek Yogurt Conversion: Strain the yogurt for a longer period to achieve a thicker consistency similar to Greek yogurt.
Flavor Infusions
- Spice Blends: Experiment with cinnamon, nutmeg, or cardamom for a spiced yogurt experience.
- Savory Yogurt: Mix in herbs like dill, chives, or garlic for a savory twist on traditional yogurt.
Embark on your yogurt-making journey with your rice cooker as your ally, and unlock the endless possibilities of homemade yogurt right in your kitchen.
Key Takeaways
- High-quality milk and starter culture are essential for making yogurt in a rice cooker.
- Utilize the 'Warm' setting for 6-8 hours for proper incubation.
- Experiment with variations in fat content and flavor enhancers for diverse yogurt options.
- Refrigerate yogurt post-incubation for at least 4 hours; enjoy up to 2 weeks of shelf life.
Equipment Needed
Making Yogurt in a Rice Cooker: A Comprehensive Guide
Making yogurt in a rice cooker is a rewarding and delicious endeavor that can cater to a wide range of experience levels in the kitchen. Whether you're a beginner looking to explore homemade yogurt or an expert seeking to optimize your yogurt-making process, this comprehensive guide will walk you through the steps to achieve creamy and tangy yogurt every time.
For Beginners: Getting Started with Yogurt Making
Essential Equipment Preparation
- Rice Cooker: Ensure your rice cooker is clean and ready for use.
- Kitchen Thermometer: Use a thermometer to monitor the temperature accurately.
- Whisk: Have a whisk on hand for thorough mixing of ingredients.
- Glass Jars: Prepare clean glass jars for storing the finished yogurt.
- Insulating Wrap: Use insulating wrap to maintain a steady temperature during fermentation.
Ingredients Gathering
- Fresh Milk: Opt for high-quality fresh milk for the best results.
- Yogurt Starter Culture: Choose a starter culture with live active cultures for consistent results.
- Sweeteners or Flavorings: Optional additions for customizing your yogurt.
Temperature Control
- Fermentation: Maintain a specific temperature range for activating live active cultures.
- Creamy Texture: Aim for the desired texture by controlling the fermentation temperature.
For Intermediate Yogurt Makers: Enhancing the Flavor Profile
Choosing the Right Starter Culture
- High-Quality Cultures: Invest in a reliable starter culture for a delicious flavor profile.
- Consistent Results: Achieve consistent results with a quality starter culture.
Flavor Customization
- Sweeteners: Experiment with honey, sugar, or other sweeteners to tailor the taste.
- Fruit Additions: Add fresh or dried fruits for a burst of flavor in your yogurt.
Texture Adjustment
- Straining: Strain the yogurt for a thicker consistency, perfect for Greek-style yogurt.
- Creaminess: Adjust the fermentation time for a creamier texture in your yogurt.
For Expert Yogurt Enthusiasts: Advanced Techniques and Tips
Probiotic Boost
- Additional Cultures: Introduce probiotic capsules for an extra boost of healthy bacteria.
- Variety: Experiment with different probiotic strains for a diverse gut health benefit.
Temperature Precision
- Thermometer Calibration: Calibrate your thermometer for precise temperature monitoring.
- Consistency: Maintain a consistent temperature throughout the fermentation process.
Flavor Infusion
- Infused Yogurt: Infuse your yogurt with herbs, spices, or vanilla for unique flavor profiles.
- Creative Additions: Think outside the box with additions like matcha powder or lavender for a gourmet touch.
Ingredients List
Making Yogurt in a Rice Cooker: A Step-by-Step Guide
Making yogurt in a rice cooker is a rewarding and straightforward process that yields delicious results. Whether you're a beginner looking to try your hand at homemade yogurt or an experienced cook seeking a new method, this comprehensive guide will walk you through each step to ensure success.
For Beginners: Getting Started
1. Ingredients Preparation
- 1 Liter of Milk**: Choose your preferred type of milk, whether it's whole, low-fat, or plant-based.
- 1/2 Cup of Yogurt**: Use a high-quality plain yogurt with live active cultures as your starter.
2. Equipment Setup
- Kitchen Thermometer: Essential for monitoring the milk temperature accurately.
- Ceramic or Glass Bowl: Use a heat-safe bowl to ferment the yogurt inside the rice cooker.
- Blanket or Towel: Insulate the rice cooker to maintain a consistent temperature during fermentation.
3. Heating and Cooling Process
- Heating the Milk: Heat the milk to 181°F (83°C) to pasteurize it and eliminate any unwanted bacteria.
- Cooling the Milk: Cool the milk to 110°F (43°C) to create the ideal environment for the yogurt cultures to thrive.
4. Fermentation
- Adding Yogurt Starter: Mix the yogurt starter with a small amount of warm milk before combining it with the rest of the milk.
- Fermentation Time: Set the rice cooker to the 'Keep Warm' setting and let the yogurt ferment for 6-8 hours or overnight.
For Intermediate Cooks: Fine-Tuning Your Yogurt
1. Consistency Adjustments
- Thicker Yogurt: Strain the yogurt through a cheesecloth or paper towel for a Greek-style consistency.
- Creamier Texture: Stir in a small amount of milk powder or cream to achieve a richer texture.
2. Flavor Enhancements
- Sweetening Options: Add honey, maple syrup, or sugar to sweeten the yogurt to your preference.
- Flavor Infusions: Experiment with adding vanilla extract, fruit purees, or spices for a unique flavor profile.
3. Storage and Serving
- Refrigeration: Once the yogurt is ready, transfer it to a sealed container and refrigerate for at least 4 hours before serving.
- Serving Suggestions: Enjoy your homemade yogurt plain, with granola, fresh fruit, or as a topping for savory dishes.
Preparing the Rice Cooker
Making Homemade Yogurt Using a Rice Cooker: A Step-by-Step Guide
Making homemade yogurt in a rice cooker is a convenient and cost-effective way to enjoy fresh, creamy yogurt right at home. Whether you're a beginner looking to experiment with fermentation or an expert seeking a new method, this detailed guide will walk you through the process from start to finish. Let's dive into the world of yogurt-making with your trusty rice cooker!
For Beginners: Getting Started with Yogurt Fermentation
Insulating Your Rice Cooker
- Blanket or Towel: Wrap your rice cooker with a thick blanket or towel to create a cozy environment for fermentation.
- Temperature Stability: Ensuring a consistent warm environment inside the rice cooker is crucial for successful yogurt fermentation.
Using a Ceramic or Glass Bowl
- Heat Distribution: Place a ceramic or glass bowl inside the rice cooker for more even heat distribution during incubation.
- Consistency: Using a separate bowl can help maintain the consistency of the yogurt throughout the fermentation process.
Starting the Fermentation
- Incubation Time: Set the rice cooker to the 'Keep Warm' setting and let the yogurt ferment for 6-8 hours.
- Checking Consistency: After the incubation period, check the yogurt for the desired thickness and tanginess.
For Intermediate Yogurt Makers: Elevating Your Homemade Yogurt
Flavoring Your Yogurt
- Honey or Maple Syrup: Add a touch of sweetness by mixing in honey or maple syrup after fermentation.
- Fruit Compote: Top your yogurt with a homemade fruit compote for a burst of flavor and natural sweetness.
Texture Enhancements
- Straining: For a thicker Greek-style yogurt, strain the fermented yogurt using a cheesecloth or coffee filter.
- Creaminess: Mix in a splash of cream or condensed milk for extra creaminess and richness.
Experimenting with Cultures
- Probiotic Strains: Explore different probiotic cultures to create unique flavors and textures in your homemade yogurt.
- Starter Cultures: Experiment with using store-bought yogurt as a starter culture for your homemade batches.
For Advanced Yogurt Enthusiasts: Fine-Tuning Your Yogurt-Making Process
Temperature Control
- Thermometer Usage: Monitor the temperature inside the rice cooker during fermentation for precise control.
- Consistency Adjustments: Make adjustments to the temperature settings based on the desired yogurt thickness and tanginess.
Multiple Batches
- Batch Size: Scale up your yogurt-making process by fermenting larger batches in the rice cooker.
- Timing: Plan ahead to stagger batches for a continuous supply of fresh homemade yogurt.
Flavor Infusions
- Spices and Herbs: Infuse your yogurt with spices like cinnamon or herbs like mint for a unique flavor profile.
- Citrus Zest: Add a zing of freshness by incorporating citrus zest into your homemade yogurt.
Preparing the Milk
Perfecting the Milk for Yogurt Making in a Rice Cooker: A Step-by-Step Guide
Creating homemade yogurt in a rice cooker starts with preparing the milk just right. Whether you're a novice in the world of yogurt making or an expert looking to refine your technique, this detailed guide will walk you through the essential steps to ensure your yogurt turns out creamy and delicious every time.
For Beginners: Getting Started on the Right Foot
1. Choosing the Right Milk
- Whole Milk: Opt for pasteurized whole milk for a richer and creamier yogurt consistency. Avoid using ultra-pasteurized milk as it may not ferment well.
- Temperature Check: Use a food thermometer to monitor the milk temperature accurately. Heating the milk to 180°F is crucial for pasteurization.
2. Heating and Cooling Process
- Pasteurization: Heat the milk in a saucepan until it reaches 180°F to eliminate harmful bacteria.
- Cooling Down: After pasteurization, cool the milk to 110°F before adding the starter culture. This temperature is ideal for the culture to thrive.
For Intermediate Cooks: Fine-Tuning Your Yogurt Prep
1. Temperature Control
- Consistency is Key: Maintain a consistent temperature during the heating and cooling process. Sudden temperature changes can affect the fermentation process.
- Use Insulation: To keep the milk at a stable temperature, consider wrapping the saucepan with a towel or placing it in a warm spot.
2. Straining the Milk
- Filtering: If needed, use a coffee filter or cheesecloth to strain the cooled milk. This step helps remove any unwanted particles or impurities that may affect the final texture of the yogurt.
For Advanced Yogurt Makers: Elevating Your Yogurt Game
1. Starter Culture Selection
- Yogurt Starter: Choose a high-quality yogurt starter culture for optimal fermentation results. You can find starter cultures specifically designed for yogurt making at specialty stores or online.
2. Flavor Infusion
- Infusing Flavors: Experiment with adding flavorings like vanilla extract, honey, or fruit preserves to the milk before fermentation. This step can enhance the taste profile of your homemade yogurt.
3. Fermentation in the Rice Cooker
- Set the Timer: Follow the recommended fermentation time provided with your yogurt starter culture. Most rice cookers have a yogurt setting that maintains the ideal temperature for fermentation.
Adding the Starter Culture
Incorporating a Starter Culture: Boosting Your Yogurt Making Process
Making yogurt with a rice cooker can be a rewarding experience, especially when you introduce a starter culture to kickstart the fermentation process. Whether you're a beginner looking to explore homemade yogurt or an expert seeking to enhance your yogurt-making skills, incorporating a starter culture is essential for achieving that tangy, creamy goodness. Let's dive into the detailed steps to ensure a successful yogurt-making journey.
For Beginners: Getting Started with Starter Culture
Choosing the Right Starter Culture
- Live Active Yogurt: Opt for a small amount of live active yogurt as your starter culture. Look for plain yogurt with active cultures, avoiding any sweetened or flavored varieties.
Mixing the Starter Culture
- Warm Milk Preparation: Heat the milk in your rice cooker until it reaches the desired temperature for fermentation, usually around 110°F (43°C).
- Incorporating the Starter Culture: Add a small amount of live active yogurt to the warmed milk. Ensure thorough mixing to evenly distribute the beneficial bacteria.
Initiating Fermentation
- Even Distribution: Stir the milk and starter culture mixture well to guarantee uniform distribution of bacteria for consistent fermentation.
- Cover and Incubate: Cover the rice cooker and maintain a stable temperature for the fermentation process to occur. This step allows the beneficial bacteria to multiply and convert lactose into lactic acid.
For Intermediate Yogurt Enthusiasts: Fine-Tuning Your Technique
Monitoring the Fermentation
- Fermentation Time: Monitor the fermentation process, which typically takes 6 to 8 hours. The longer the fermentation, the tangier the yogurt will be.
- Taste Testing: Sample the yogurt periodically to determine the desired level of tanginess. Adjust fermentation time accordingly for future batches.
Refrigeration and Storage
- Cooling Down: Once the yogurt reaches the desired consistency, refrigerate it to halt the fermentation process and chill the yogurt.
- Storage Tips: Store the homemade yogurt in airtight containers in the refrigerator. It can last for up to 2 weeks, but freshness is best within the first week.
For Advanced Yogurt Connoisseurs: Elevating Your Yogurt Game
Experimenting with Cultures
- Exploring Different Cultures: Venture into using different starter cultures like probiotic capsules or powdered yogurt starters for unique flavor profiles.
- Maintaining Culture Viability: Ensure the starter culture remains active by using fresh batches periodically or reviving dormant cultures.
Flavor Infusion and Customization
- Adding Flavorings: Experiment with adding fruits, honey, or spices to the yogurt before or after fermentation to create personalized variations.
- Texture Modification: Adjust the fermentation time or strain the yogurt through cheesecloth for a thicker Greek-style yogurt consistency.
Conclusion
My Yogurt Making Journey with the Rice Cooker
Being a health enthusiast and a lover of homemade goodies, my exploration with making yogurt in a rice cooker has been nothing short of a delightful adventure. Initially, I was a bit skeptical about using this unconventional method, but the convenience and flexibility it offers quickly won me over. Let me share with you some personal experiences and tips that have turned my yogurt-making routine into a fun and rewarding ritual.
A Budget-Friendly Health Boost
When I first dabbled in making yogurt in my rice cooker, I was pleasantly surprised by how easy and cost-effective it was. Instead of constantly buying store-bought yogurt with added sugars and preservatives, I could now whip up fresh batches at home using quality ingredients. Not only did this save me money in the long run, but it also ensured that I was consuming a wholesome and nutritious snack packed with probiotics for gut health.
Customizing for Flavorful Adventures
One of the things I love most about making yogurt in a rice cooker is the endless customization options it offers. From experimenting with different milk types like almond or coconut to adding in natural sweeteners like honey or maple syrup, the possibilities are truly endless. I've even dabbled in mixing in fresh fruits, nuts, and seeds to create unique flavor combinations that cater to my taste preferences.
Embracing the Art of Patience and Precision
Yogurt-making in a rice cooker has taught me the importance of patience and precision in the kitchen. Monitoring the temperature during the incubation period and ensuring the yogurt reaches the desired consistency may seem daunting at first, but with practice, it becomes second nature. The satisfaction of seeing a perfectly set batch of homemade yogurt after patiently waiting for the process to complete is truly rewarding.
Sharing the Yogurt-Making Joy
One of the highlights of my yogurt-making journey has been sharing this newfound skill with friends and family. Whether it's hosting a yogurt-making workshop or gifting jars of homemade yogurt as a thoughtful gesture, spreading the joy of creating something wholesome and delicious has been a heartwarming experience. Seeing the smiles on their faces as they taste the creamy goodness of freshly made yogurt is truly priceless.
In conclusion, making yogurt in a rice cooker has transformed my snacking habits and introduced me to a world of culinary creativity. It's not just about yogurt; it's about embracing a healthier lifestyle, exploring new flavors, and sharing the joy of homemade goodness with loved ones. If you're looking to add a touch of wellness and creativity to your kitchen routine, I highly recommend giving yogurt-making in a rice cooker a try. I promise you won't be disappointed—it's a journey worth embarking on for a healthier and happier you.