Achieving the Perfect Burnt Rice: A Detailed Guide
Creating that perfect crispy layer on your rice can elevate your dish to a whole new level. Whether you're a beginner looking to master the art of burnt rice or an expert aiming to perfect your technique, this detailed guide will walk you through the process step by step. Let's dive into the secrets of achieving the ideal burnt rice texture that adds depth and flavor to your meals.
For Beginners: Getting Started
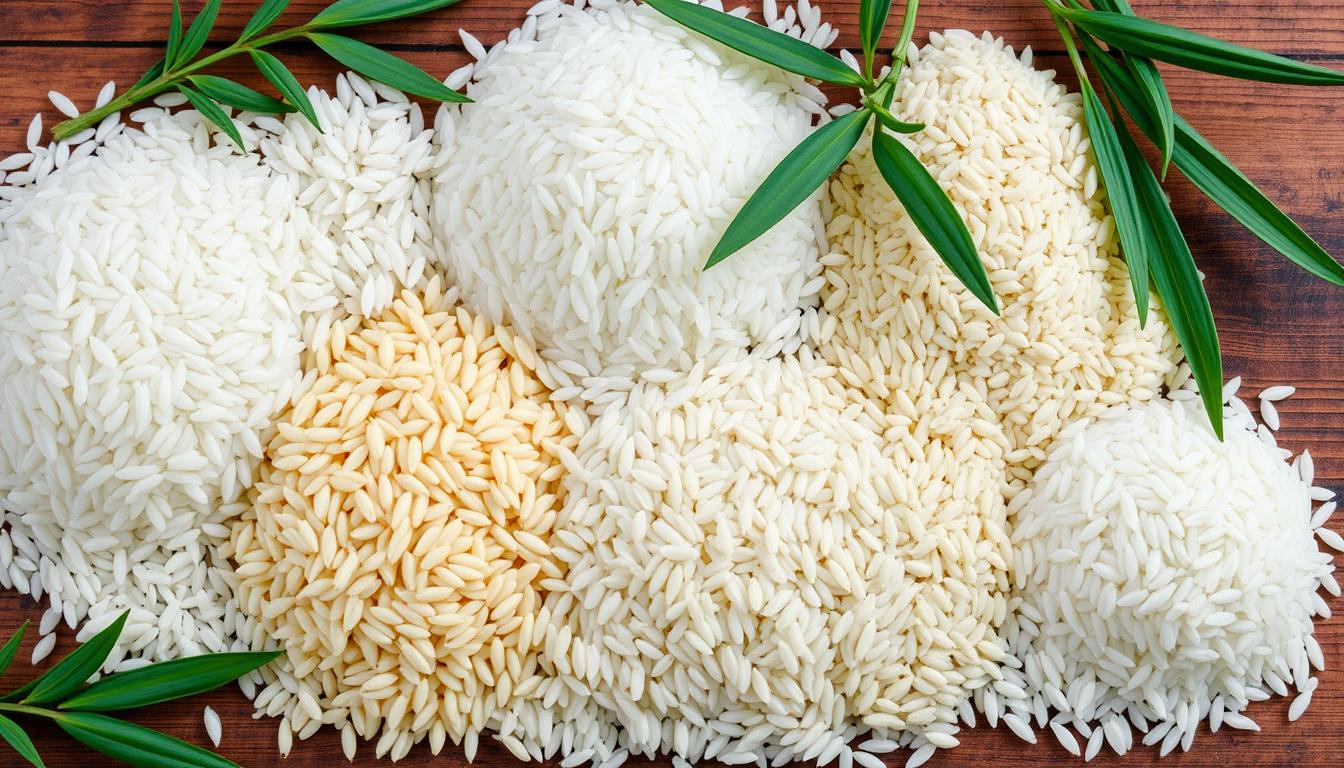
Selecting the Right Rice
- Short-Grain Rice: Opt for short-grain rice like sushi rice or Arborio for a stickier texture, which is ideal for burnt rice.
- Washing the Rice: Rinse the rice before cooking to remove excess starch, which can help prevent the rice from becoming too mushy.
Preparing Your Cooking Equipment
- Non-Stick Pan: Use a non-stick pan to prevent the rice from sticking excessively and burning too quickly.
- Heat Control: Start with medium heat to allow the rice to crisp up evenly without burning too fast.
Cooking Process
- Adding the Rice: Spread a thin layer of washed rice evenly on the pan to ensure consistent crisping.
- Stirring Technique: Stir the rice occasionally to prevent it from burning in one spot and to achieve an even crispy texture.
For Intermediate Cooks: Enhancing the Flavor
Infusing Flavors
- Seasoning: Add seasonings like salt, pepper, or your favorite spices to the rice for extra flavor.
- Garlic and Onions: Sauté minced garlic or onions with the rice for a savory kick.
Texture and Crunch
- Oil Drizzle: Drizzle a bit of oil over the rice to enhance the crunchiness and add a rich flavor.
- Toasting the Rice: Allow the rice to toast slightly before stirring to develop a nutty flavor profile.
For Experts: Advanced Techniques and Variations
Experimenting with Ingredients
- Vegetable Broth: Cook the rice in vegetable broth instead of water for a depth of flavor.
- Adding Nuts: Toasted nuts like almonds or cashews can add a crunchy texture and a hint of nuttiness to the burnt rice.
Presentation and Serving
- Garnishes: Sprinkle chopped herbs like parsley or cilantro on top of the burnt rice for a pop of freshness.
- Pairing Suggestions: Serve the burnt rice as a side dish with grilled meats or roasted vegetables for a complete meal.
Customization and Innovation
- Fusion Flavors: Incorporate ingredients like soy sauce, sesame oil, and scallions for an Asian-inspired twist on burnt rice.
- Cheese Topping: Sprinkle grated cheese over the burnt rice and broil for a cheesy, crispy finish.
By following these detailed steps and experimenting with different flavors and techniques, you can create a delicious and unique burnt rice dish that will impress your taste buds and elevate your culinary skills.
Key Takeaways
- Use short-grain rice and wash it for crispy texture.
- Season rice and stir occasionally in a non-stick pan.
- Infuse flavors with garlic, oils, and herbs for enhanced taste.
- Experiment with ingredients, presentation, and garnishes for variety.
Rice Selection and Preparation
Mastering the Art of Making Burnt Rice: A Step-by-Step Guide
Making burnt rice, also known as nurungji, is a culinary art that requires precision and technique. Whether you're a novice in the kitchen or a seasoned cook looking to perfect your burnt rice game, this detailed guide will walk you through the process step by step, ensuring a crispy and delicious outcome every time.
For Beginners: Getting Started
Selecting the Right Short Grain Rice
- Rinsing Technique: Thoroughly rinse the short grain rice until the water runs clear. This helps remove excess starch and prevents sogginess during cooking.
- Soaking Method: Soak the Korean rice in water for at least 30 minutes before cooking. This ensures even cooking and results in a fluffy texture.
Preparing the Rice for Cooking
- Boiling Process: Use a pot over medium-high heat to boil the rice. Allow a thin, golden, crispy layer to form at the bottom of the pot.
- Adjusting Cooking Time: The key is to use high heat and adjust the cooking time based on your preference for nurungji (scorched rice) or regular crispy rice.
For Intermediate Cooks: Elevating Your Burnt Rice Game
Achieving the Perfect Texture
- Stirring Technique: Stir the rice occasionally during the cooking process to prevent burning and ensure an even crispy layer.
- Monitoring Heat: Keep a close eye on the heat to prevent the rice from burning too quickly or not crisping up enough.
Flavor Enhancements
- Seasoning Options: Consider adding a sprinkle of salt or other seasonings to enhance the flavor of the burnt rice.
- Infusing Aromatics: Experiment with adding garlic, ginger, or scallions to the rice for a flavorful twist.
Presentation Tips
- Molding the Rice: Use a rice bowl or mold to shape the burnt rice into a visually appealing mound before serving.
- Garnishing Ideas: Sprinkle sesame seeds, nori flakes, or furikake on top of the burnt rice for added flavor and texture.
For Advanced Chefs: Fine-tuning Your Technique
Experimenting with Different Rice Varieties
- Exploring Variations: Try using different types of short grain rice, such as sushi rice or jasmine rice, to create unique flavors and textures.
- Mixing Grains: Combine different grains, like barley or wild rice, with the short grain rice for a multilayered burnt rice experience.
Mastering the Crispy Layer
- Adjusting Heat Levels: Fine-tune the heat settings to achieve the perfect balance of crispy texture and golden color.
- Testing for Crunchiness: Taste-test the burnt rice periodically to ensure it reaches your desired level of crispiness.
Serving Suggestions
- Pairing with Dishes: Serve the burnt rice alongside traditional Korean dishes like bulgogi or kimchi for a complete meal experience.
- Creating Fusion Dishes: Experiment with incorporating burnt rice into non-traditional dishes, such as rice bowls or salads, for a modern twist.
Achieving the Perfect Burnt Crust
Mastering the Art of Perfect Burnt Crust on Rice: A Step-by-Step Guide
Achieving the perfect burnt crust on rice, also known as nurungji in Korean cuisine, requires attention to detail and a few key techniques. Whether you're a beginner looking to explore new flavors or an experienced cook aiming to enhance your culinary skills, this step-by-step guide will help you master the art of creating a crispy and flavorful burnt rice masterpiece.
For Beginners: Getting Started
Selecting the Right Rice
- Short-Grain Rice: Opt for short-grain rice, such as Korean short-grain rice or Japanese sushi rice, as they've a higher starch content that contributes to the crispy texture of nurungji.
Preparing the Rice
- Rinsing: Rinse the rice thoroughly in cold water to remove excess starch. This step helps prevent the rice from becoming overly sticky during the cooking process.
- Soaking: Soak the rinsed rice in water for about 30 minutes before cooking. This helps the rice cook more evenly and promotes the formation of a crispy crust.
Cooking Process
Browning the Rice
- Dry Roasting: Heat a skillet over medium heat and add the soaked rice without any oil. Stir continuously to prevent burning and ensure even browning.
- Monitoring: Keep a close eye on the rice as it browns. Stir frequently to distribute the heat evenly and prevent any spots from burning.
Creating the Crispy Layer
- Patience is Key: Allow the rice to continue cooking in the skillet until it forms a crispy layer at the bottom. This process requires patience and careful monitoring to achieve the desired texture.
- Texture Check: Listen for a faint crackling sound and observe the color of the rice to determine if the crust has formed. It should be golden brown and crispy.
For Intermediate Cooks: Elevating the Flavors
Adding Aromatics
- Garlic and Onion: Enhance the flavor of the burnt rice by sautéing minced garlic and onion in the skillet before adding the rice. This adds depth and complexity to the dish.
- Soy Sauce: For a savory umami kick, drizzle a bit of soy sauce over the rice as it browns. The soy sauce caramelizes and adds a rich flavor to the crispy crust.
Serving Suggestions
- Toppings: Sprinkle toasted sesame seeds, chopped green onions, or nori flakes over the finished burnt rice for added flavor and visual appeal.
- Pairing: Enjoy the burnt rice as a side dish to accompany grilled meats, stews, or Korean-style soups for a complete and satisfying meal.
For Advanced Cooks: Experimenting with Variations
Mixed Grains
- Multigrain Blend: Incorporate other grains such as barley, millet, or quinoa with the rice to create a unique blend of textures and flavors in the burnt crust.
- Toasting Nuts: Add toasted pine nuts, almonds, or sesame seeds to the rice as it browns for an extra crunch and nuttiness.
Fusion Flavors
- Spicy Kick: Mix gochujang (Korean chili paste) or sriracha into the rice for a spicy twist on the traditional burnt crust.
- Sweet and Savory: Drizzle honey or maple syrup over the finished burnt rice for a delightful combination of sweet and savory flavors.
Embrace the art of achieving the perfect burnt crust on rice as you experiment with different ingredients and techniques to create a dish that isn't only delicious but also a nod to the rich culinary traditions of Korean cuisine. Get ready to savor the nutty, crunchy goodness of nurungji and impress your family and friends with your newfound culinary skills!
Cooking the Burnt Rice
Mastering the Art of Cooking Burnt Rice: A Step-by-Step Guide
Cooking burnt rice to perfection requires attention to detail and a precise technique to achieve that ideal golden brown and crispy texture. Whether you're a novice cook or a seasoned chef looking to elevate your culinary skills, this comprehensive guide will walk you through the process of creating delicious burnt rice, also known as nurungji in Korean cuisine.
For Beginners: Getting Started on the Right Foot
Selecting the Right Rice
- Short-Grain Rice: Opt for short-grain rice varieties like sushi rice or Korean rice, known for their sticky texture ideal for creating crispy burnt rice.
- Quality Matters: Choose high-quality rice for the best results, as it can impact the final texture and flavor of the burnt rice.
Preparing the Rice
- Rinsing the Rice: Rinse the rice under cold water until the water runs clear to remove excess starch, which can affect the texture of the burnt rice.
- Soaking the Rice: Allow the rice to soak in water for 30 minutes to an hour before cooking to ensure even cooking and a fluffy texture.
Cooking Process
- Boiling the Rice: Cook the rice in a pot with the appropriate amount of water according to the rice variety's cooking instructions.
- Monitoring Heat: Adjust the heat as needed to prevent burning while allowing the rice to develop a crispy layer.
For Intermediate Cooks: Elevating Your Burnt Rice Game
Achieving the Perfect Burnt Crust
- Creating a Crispy Layer: Stir the rice occasionally to promote even browning and prevent sticking to the bottom of the pot.
- Adjusting Heat Levels: Experiment with different heat settings to find the right balance between crisping the rice and avoiding scorching.
Flavor Enhancements
- Adding Seasonings: Sprinkle salt, pepper, or your favorite seasoning blend over the rice during cooking to infuse it with flavor.
- Incorporating Aromatics: Toss in garlic, onion, or ginger while cooking the rice for a fragrant and flavorful burnt rice experience.
Serving Suggestions
- Enjoy as a Snack: Crispy burnt rice makes a delicious snack on its own, perfect for munching on while watching a movie or reading a book.
- Pairing with Dishes: Use burnt rice as a crunchy topping for salads, soups, or stir-fries to add a textural contrast to your favorite dishes.
For Advanced Cooks: Fine-Tuning Your Burnt Rice Technique
Experimenting with Variations
- Mixed Grains: Combine different types of grains like barley, quinoa, or wild rice with short-grain rice for a unique and flavorful burnt rice medley.
- Herbs and Spices: Infuse the rice with herbs like thyme, basil, or spices like cumin, turmeric, or paprika for a gourmet burnt rice experience.
Texture and Doneness
- Crispiness Control: Adjust the cooking time and heat levels to achieve your desired level of crispiness, whether you prefer a light golden crust or a deep, crunchy texture.
- Testing for Doneness: Use a spatula to gently lift the rice from the bottom of the pot to check for a crispy layer and a tender interior.
Presentation and Garnishes
- Plating Creativity: Serve burnt rice in a bowl or mold it into shapes for an artistic presentation that showcases the crispy texture.
- Garnish Options: Top burnt rice with sesame seeds, chopped scallions, or a drizzle of soy sauce for an added burst of flavor and visual appeal.
Serving and Enjoying
Exploring Delicious Ways to Serve and Enjoy Nurungji
Discover the art of serving and enjoying burnt rice, or nurungji, in delightful and creative ways. Whether you're a novice looking to try something new or an experienced food enthusiast seeking to elevate your culinary experience, nurungji offers a unique blend of flavors and textures to savor. Let's explore how you can make the most of this crispy and crunchy treat:
For Beginners: Getting Started with Nurungji
Making Nurungji
- Prepare the Burnt Rice: Add a cup of water to the burnt rice at the bottom of the pot and heat it until the water evaporates, creating crispy nurungji.
- Achieving the Desired Texture: Let the burnt rice simmer until it reaches the desired level of crispiness, ensuring a delightful crunch in every bite.
Serving Suggestions
- Stand-Alone Snack: Enjoy nurungji on its own to appreciate its crispy texture and nutty flavor.
- Pairing with Banchan: Combine nurungji with savory banchan like kimchi or furikake to create a harmonious blend of flavors and textures.
- Sweet Treat: For a touch of sweetness, sprinkle sugar on nurungji to transform it into a delectable dessert option.
For Intermediate Cooks: Elevating the Nurungji Experience
Customizing Flavors
- Experiment with Condiments: Try different condiments like soy sauce, sesame oil, or gochujang to add depth and complexity to the flavor profile of nurungji.
- Seasoning Variations: Explore seasonings like garlic powder, onion powder, or chili flakes to customize the taste according to your preferences.
Creative Pairings
- Cheese and Nurungji: Melt cheese over crispy nurungji for a decadent and indulgent snack that combines crunchy and gooey textures.
- Nurungji Rice Balls: Form nurungji into rice balls with a sprinkle of sesame seeds for a portable and satisfying snack option.
For Advanced Food Enthusiasts: Innovative Nurungji Creations
Fusion Flavors
- Nurungji Tacos: Use nurungji as a crunchy filling in tacos, along with fresh vegetables and a drizzle of spicy mayo for a fusion twist.
- Nurungji Salad: Incorporate crispy nurungji into a vibrant salad with mixed greens, cherry tomatoes, and a tangy vinaigrette for a refreshing dish.
Dessert Delights
- Nurungji Parfait: Layer crispy nurungji with yogurt, fresh berries, and a drizzle of honey for a unique and satisfying parfait dessert.
- Nurungji Ice Cream Topping: Sprinkle crushed nurungji over vanilla ice cream for a contrasting combination of creamy and crunchy textures.
Explore the versatility of nurungji and unleash your creativity in serving and enjoying this crispy delicacy. With endless possibilities for customization and innovative pairings, nurungji is sure to surprise and delight your taste buds. Enjoy the process of experimenting with different flavors and textures to create unique culinary experiences with nurungji.
Tips for Mastering Burnt Rice
Mastering Burnt Rice: A Step-by-Step Guide
Mastering burnt rice is an art that requires attention to detail and precision in the cooking process. Whether you're a beginner looking to add a crispy texture to your rice or an expert aiming to perfect your burnt rice technique, this guide will help you achieve the ideal balance of flavor and crunch in your dish.
For Beginners: Getting Started
Choosing the Right Rice
- White Rice: White rice is a great option for beginners as it crisps up beautifully and is forgiving if you're new to making burnt rice.
- Rinsing the Rice: Rinse your rice before cooking to remove excess starch, which can help prevent sticking and ensure a crispy finish.
Cooking Equipment
- Non-Stick Pan: Using a non-stick pan can make it easier to achieve a crispy bottom layer without burning the rice.
- Lid with Ventilation: Opt for a lid with a small vent to allow steam to escape, preventing condensation that can make the rice soggy.
Monitoring the Cooking Process
- Low to Medium Heat: Start with low to medium heat to prevent the rice from burning too quickly.
- Stirring Occasionally: Stir the rice occasionally to ensure even browning and prevent hot spots that can lead to burnt patches.
For Intermediate Cooks: Enhancing the Flavor
Experimenting with Rice Varieties
- Brown Rice: Try using brown rice for a nuttier flavor and chewier texture in your burnt rice dish.
- Mixing Grains: Mix different types of rice, like jasmine and wild rice, for a unique blend of flavors and textures.
Seasoning and Spices
- Soy Sauce Glaze: Drizzle soy sauce over the rice while it's cooking for a savory umami flavor.
- Garlic and Ginger: Add minced garlic and ginger for a fragrant and aromatic twist to your burnt rice.
Serving Suggestions
- Toppings: Sprinkle toasted sesame seeds, chopped green onions, or crispy fried shallots on top of your burnt rice for added crunch and flavor.
- Pairing: Burnt rice pairs well with dishes like stir-fries, grilled meats, or tofu dishes for a contrasting texture and taste profile.
For Experts: Fine-Tuning Your Technique
Perfecting the Crispiness
- Golden-Brown Hue: Aim for a deep golden-brown color on the bottom layer of the rice for optimal crispiness.
- Texture Check: Listen for a slight crackling sound and check for a crispy texture when gently pressing down on the rice.
Customizing Your Burnt Rice
- Infusing Flavors: Experiment with adding ingredients like dried mushrooms, seaweed flakes, or furikake seasoning for a burst of umami in your burnt rice.
- Layering Technique: Try layering thinly sliced vegetables or proteins between the rice layers for added complexity and variety.
Presentation and Plating
- Molded Shapes: Use a small bowl or mold to shape the burnt rice into individual servings for a visually appealing presentation.
- Garnishes: Garnish your burnt rice with fresh herbs, edible flowers, or a drizzle of chili oil to elevate the dish's presentation and flavor profile.
Conclusion
My Love for Perfectly Burnt Rice
Being a self-proclaimed food enthusiast and home cook, I've embarked on a quest to master the art of making the perfect burnt rice. It may seem like a simple dish, but believe me, there's a world of flavor and texture waiting to be explored in that crispy, charred crust. Through my deep dive into research and countless experiments in the kitchen, I've uncovered some invaluable insights and techniques that have elevated my burnt rice game to a whole new level.
The Joy of Choosing the Right Rice
One of the most crucial steps in creating the perfect burnt rice is selecting the right rice. I've experimented with different varieties, from short-grain to long-grain, and found that each type brings its unique texture and flavor to the dish. Personally, I prefer using short-grain rice for its sticky consistency, which helps in achieving that coveted crispy crust while maintaining a tender interior. It's all about finding the rice that suits your preferences and cooking style.
The Art of Achieving the Perfect Burnt Crust
The key to making burnt rice lies in achieving that perfect burnt crust without compromising the overall texture of the dish. I've learned through trial and error that controlling the heat and cooking time is essential. Cooking the rice on low heat allows the bottom layer to slowly caramelize and develop a deep, nutty flavor, while keeping a watchful eye to prevent it from burning too quickly. It's a delicate balance that requires patience and attention to detail, but the results are truly worth it.
Cooking with Care and Attention to Detail
Cooking burnt rice isn't just about leaving it on the stove and forgetting about it. It's a process that demands care and attention every step of the way. From rinsing the rice to ensure the perfect texture to layering it evenly in the pot for even cooking, every detail counts. I've found that taking the time to follow each step meticulously results in a dish that isn't only visually stunning but also bursting with complex flavors that keep you coming back for more.
Serving with Flair and Creativity
The final step in mastering burnt rice is in the presentation and serving. I love to get creative with my plating, adding fresh herbs, a drizzle of olive oil, or a sprinkle of toasted sesame seeds to elevate the dish visually and add an extra layer of flavor. Serving burnt rice in individual portions or family-style adds a touch of warmth and camaraderie to the dining experience, making it a dish that isn't just delicious but also memorable.
In conclusion, my journey with burnt rice has been a delightful exploration of flavors, textures, and culinary techniques. By selecting the right rice, mastering the art of achieving the perfect burnt crust, cooking with care and attention to detail, and serving with flair and creativity, I've unlocked a world of possibilities in this humble dish. So, to all the fellow food enthusiasts out there, I urge you to embrace the joy of making burnt rice and infuse it with your personal touch. It's a culinary adventure that's sure to bring a smile to your face and warmth to your soul. Happy cooking!