Mastering Sushi Rice in a Rice Cooker: A Comprehensive Guide
Cooking sushi rice in a rice cooker can elevate your homemade sushi experience to a whole new level. Whether you're a beginner sushi enthusiast or a seasoned chef looking to streamline your sushi rice preparation, this detailed guide will help you achieve that perfect sticky texture and authentic flavor profile every time.
For Beginners: Getting Started with Sushi Rice
Preparing Your Sushi Rice
- Rinsing the Rice: Before cooking, rinse the sushi rice under cold water until the water runs clear. This helps remove excess starch for a better texture.
- Soaking the Rice: Let the rinsed rice soak in water for about 30 minutes to allow it to absorb moisture evenly.
Measuring Water and Rice
- Water Ratio: Use a 1:1 ratio of water to rice for sushi rice. This ensures the rice cooks to the right consistency.
- Seasoning: Mix in sushi vinegar, sugar, and salt after cooking for that traditional sushi rice flavor.
Cooking Process
- Cooking Setting: Select the sushi or white rice setting on your rice cooker for optimal results.
- Letting it Rest: After cooking, let the rice rest for 10-15 minutes to allow it to firm up for sushi rolling.
For Intermediate Cooks: Elevating Your Sushi Rice
Adding Extras for Flavor
- Kombu: Place a piece of kombu (dried kelp) in the water while cooking to infuse a subtle umami flavor into the rice.
- Mirin: A splash of mirin (sweet rice wine) can add a hint of sweetness to your sushi rice.
Perfecting the Texture
- Fanning the Rice: While the rice is resting, gently fan it to help cool it down and give it the right texture for sushi.
Experimenting with Variations
- Brown Sushi Rice: Try using brown sushi rice for a nuttier flavor and extra nutrients in your sushi rolls.
For Experts: Advanced Tips and Techniques
Sushi Rice Maintenance
- Proper Storage: Store leftover sushi rice in a damp cloth to prevent it from drying out.
- Temperature Control: Keep your sushi rice at room temperature for the best texture and flavor.
Sushi Rice Artistry
- Shaping Techniques: Explore different shaping techniques like nigiri or maki rolls to showcase your sushi rice skills.
- Garnishing: Enhance the visual appeal of your sushi by garnishing with sesame seeds, nori strips, or tobiko.
By following these detailed steps and tips, you can master the art of cooking sushi rice in a rice cooker and create restaurant-quality sushi in the comfort of your own kitchen. Enjoy the process and savor the delicious results!
Key Takeaways
- Sushi rice can be cooked in a rice cooker using a 1:1 water-to-rice ratio.
- Enhance sushi rice with kombu, mirin, and fanning for optimal flavor and texture.
- Experiment with different rice types like brown sushi rice for varied taste and nutrients.
- Choose a rice cooker with sushi rice settings and precise controls for best results.
Sushi Rice Cooker Compatibility
Choosing the Best Rice Cooker for Sushi Rice Perfection
Selecting the perfect rice cooker for cooking sushi rice can make a world of difference in your culinary adventures. Whether you're a novice looking to create your first sushi rolls or an experienced sushi chef aiming for perfection, having the right rice cooker can elevate your sushi rice game to new heights. Let's explore the essential features and considerations to ensure compatibility with sushi rice cooking requirements.
For Beginners: Seamless Sushi Rice Preparation
Understanding Sushi Rice Needs
- Sushi Rice Setting: Look for a rice cooker that offers a dedicated sushi rice setting. This preset option takes the guesswork out of achieving the ideal texture and consistency for your sushi rice.
- Water-to-Rice Ratio: Ensure the rice cooker provides precise measurements for water-to-rice ratio. Consistency in this ratio is crucial for perfectly cooked sushi rice every time.
- Optimal Temperature Control: A rice cooker with precise temperature control guarantees that your sushi rice is cooked at the right heat level throughout the process, resulting in the perfect stickiness and taste.
Cooking Process Simplified
- Easy Operation: Opt for a user-friendly rice cooker with clear instructions for sushi rice preparation. This will streamline the cooking process, making it accessible even for beginners.
- Timer Feature: Some rice cookers come with a timer function, allowing you to set the cooking time precisely for perfectly timed sushi rice.
For Intermediate Cooks: Elevating Your Sushi Rice Game
Advanced Features to Consider
- Fuzzy Logic Technology: Advanced rice cookers with fuzzy logic technology can adjust cooking parameters for different types of rice, including sushi rice, ensuring optimal results.
- Keep Warm Function: Look for a rice cooker with a keep warm function to maintain the ideal serving temperature for your sushi rice without overcooking it.
- Non-Stick Inner Pot: Investing in a rice cooker with a non-stick inner pot makes cleaning up after preparing sushi rice a breeze.
Customization Options
- Customizable Settings: Some rice cookers offer customizable settings for sushi rice, allowing you to adjust cooking times and temperatures according to your preferences.
- Delay Start Feature: If you want freshly cooked sushi rice at a specific time, a rice cooker with a delay start feature can be a game-changer.
For Experts: Fine-Tuning Your Sushi Rice Perfection
Professional Tips and Tricks
- Rice Washing Function: Consider a rice cooker with a built-in rice washing function to streamline the prep process and ensure perfectly clean sushi rice.
- Multi-Functional Capabilities: Look for rice cookers that can also be used for other Japanese dishes, such as steaming ingredients for sushi rolls or cooking dashi broth.
- High-End Brands: For sushi aficionados looking for top-notch quality, explore rice cookers from renowned brands known for their precision and reliability in sushi rice preparation.
Maintenance and Care
- Regular Cleaning: To prolong the life of your rice cooker and maintain optimal performance, follow the manufacturer's instructions for regular cleaning and maintenance.
- Storage Tips: Store your rice cooker in a cool, dry place when not in use to prevent any damage and ensure it's ready for your next sushi rice creation.
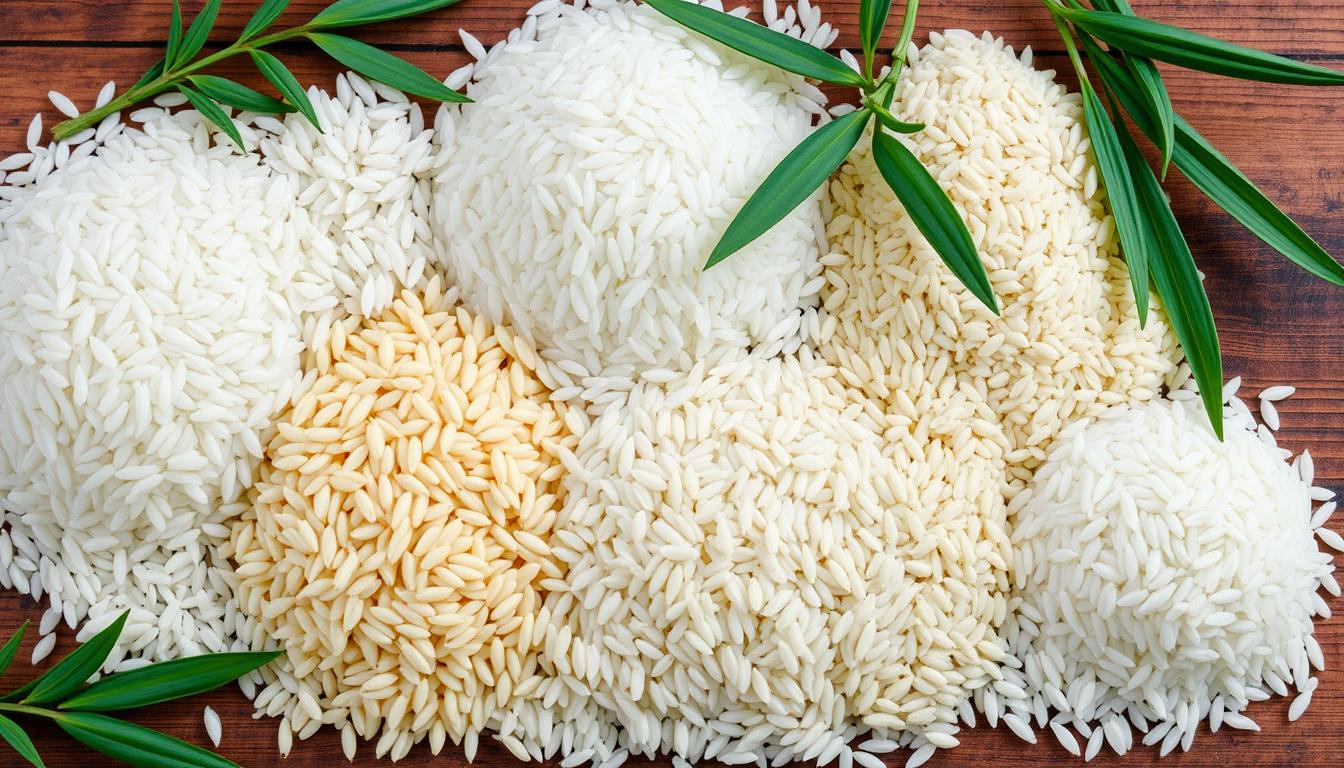
Rice Type Recommendations
Choosing the Perfect Rice for Sushi: A Comprehensive Guide
When it comes to making sushi, the type of rice you use is crucial in achieving the right texture and flavor. Whether you're a beginner looking to try your hand at sushi making or an experienced chef aiming for perfection, selecting the right rice can make all the difference. Let's explore the recommended types of rice for sushi preparation to help you create delicious sushi every time.
For Beginners: Getting Started
Understanding Sushi Rice
- Sushi Rice Varieties: Traditional Japanese short-grain rice varieties like Nishiki, Tamanishiki, and Yuki Tsubaki are excellent choices for authentic sushi.
- Short-Grain Rice: Varieties such as Koshihikari, Tamaki Gold, and Koda Farms Kokuho provide the sticky consistency essential for sushi rice.
- White Medium-Grain Rice: While short-grain rice is preferred, white medium-grain rice can also be used as an alternative for sushi preparation.
Cooking Basics
- Washing the Rice: Rinse the rice thoroughly to remove excess starch, which can affect the texture of your sushi rice.
- Cooking Method: Use a rice cooker or a pot to cook the rice according to the package instructions for the best results.
For Intermediate Cooks: Enhancing Your Sushi
Amylopectin Content
- Importance of Amylopectin: The high amylopectin content found in short-grain rice is what gives sushi rice its desired sticky texture, crucial for perfect sushi consistency.
- Sticky Texture: Look for rice varieties with a higher amylopectin content to ensure your sushi rice sticks together well.
Seasoning Tips
- Sushi Vinegar: Season the cooked rice with sushi vinegar, sugar, and salt to add flavor and achieve the signature sushi rice taste.
- Furikake: Sprinkle furikake, a Japanese seasoning blend, over your sushi rice for added flavor and visual appeal.
Rice Preparation
- Proper Cooling: After cooking, cool the rice with a fan or by fanning it gently to ensure the right texture for sushi rolling.
- Avoid Overmixing: When seasoning the rice, gently fold in the vinegar mixture to avoid mashing the grains.
For Advanced Chefs: Fine-Tuning Your Technique
Rice Quality
- Premium Grades: Opt for premium-grade sushi rice for the best flavor and texture in your sushi.
- Aged Rice: Consider using aged rice for sushi making, as it can provide a more nuanced flavor profile.
Hand-rolling Techniques
- Sushi Rolling: Master the art of hand-rolling sushi to create perfectly shaped and tightly packed rolls.
- Sushi Mat Usage: Use a bamboo sushi mat to help shape and roll your sushi with precision.
Experimentation
- Customizing Fillings: Get creative with your sushi fillings by experimenting with different ingredients and flavor combinations.
- Fusion Sushi: Explore fusion sushi recipes that blend traditional Japanese techniques with international ingredients for a unique twist.
Selecting the right rice type is essential in creating delicious sushi, ensuring that every grain holds the ideal balance of moisture and stickiness to complement your sushi fillings perfectly. Whether you're a novice sushi chef or a seasoned pro, choosing the right rice can elevate your sushi-making experience to new heights.
Water-to-Rice Ratio
Mastering the Water-to-Rice Ratio for Perfect Sushi Rice in a Rice Cooker
Cooking sushi rice to perfection requires attention to detail, especially when it comes to the water-to-rice ratio. Whether you're a novice in the kitchen or a seasoned sushi chef, mastering this ratio is essential for achieving the ideal texture and consistency in your rice. Let's explore the steps to ensure you get it right every time.
For Beginners: Getting Started on the Right Foot
Measuring the Ingredients
- 1:1 Ratio: The golden rule for sushi rice is to use equal parts of water and rice. This means for every cup of rice, you'll need one cup of water. Keeping this ratio ensures that your rice cooks evenly and retains the perfect amount of moisture.
- Rinsing the Rice: Before cooking, rinse the rice under cold water until the water runs clear. This helps remove excess starch and ensures a fluffier final result.
Using Your Rice Cooker
- Adding Water: Measure the water accurately based on the amount of rice you're cooking. Most rice cookers come with marked lines indicating water levels for different quantities of rice.
- Selecting the Setting: For sushi rice, choose the appropriate setting on your rice cooker. If your cooker has a sushi rice setting, that's the one to go for.
Cooking Process
- Cooking Time: Once you start the rice cooker, avoid opening the lid frequently to check on the rice. Let it cook undisturbed to ensure even cooking.
- Resting Period: After the cooking cycle is complete, let the rice rest in the cooker for about 10-15 minutes. This allows the rice to steam and finish cooking off the heat.
For Intermediate Cooks: Elevating Your Sushi Rice Game
Enhancing the Flavor
- Seasoning: After the rice is cooked, mix in seasoned rice vinegar to add flavor and the signature sushi rice taste. You can also add a pinch of salt and sugar for balance.
- Furikake: For an extra burst of flavor, sprinkle some furikake (Japanese seasoning mix) over the rice before serving.
Perfecting the Texture
- Fluffing the Rice: Use a wooden or plastic rice paddle to gently fluff the rice after cooking. Avoid using metal utensils as they can damage the rice grains.
- Fan the Rice: For a glossy finish, gently fan the rice while fluffing it to help remove excess moisture and cool it down.
Experimenting with Variations
- Adding Extras: Feel free to mix in ingredients like sesame seeds, diced vegetables, or cooked seafood to create unique sushi rice variations.
- Temperature Control: Keep an eye on the rice cooker's temperature settings to prevent the rice from getting too sticky or too dry.
Washing Sushi Rice
Washing Sushi Rice: A Comprehensive Guide
Washing sushi rice is a crucial step in preparing delicious and authentic sushi dishes. Whether you're a beginner looking to master the basics or an experienced sushi chef aiming for perfection, this guide will provide you with detailed instructions to ensure your sushi rice is of the highest quality.
For Beginners: Getting Started
Choosing the Right Rice
- Short-grain Rice: Opt for short-grain Japanese rice, also known as sushi rice, for the best results in sushi making.
- Quality Check: Ensure the rice is fresh and free from any impurities before starting the washing process.
Preparing for Washing
- Measuring the Rice: Use a measuring cup to portion the rice according to your recipe requirements.
- Soaking the Rice: Place the rice in a bowl and cover it with cold water. Gently swish the rice around to remove any excess starch.
Washing Techniques: Step by Step
First Rinse
- Initial Wash: Rinse the rice under cold running water while gently agitating it with your fingers. This helps remove surface starch and debris.
- Water Check: Continue rinsing until the water runs cloudy. This indicates the removal of excess starch.
Second Rinse
- Drain and Repeat: Drain the cloudy water and repeat the rinsing process. This step further cleanses the rice for optimal texture and flavor.
- Gentle Handling: Be gentle to avoid breaking the rice grains while ensuring thorough washing.
Advanced Tips for Expert Chefs
Polishing the Rice
- Repeated Rinsing: For a more polished finish, continue rinsing the rice until the water runs almost clear. This extra step enhances the rice's texture and appearance.
- Patience is Key: Take your time to ensure each grain is properly washed for a refined sushi rice outcome.
Final Checks
- Texture Test: Squeeze a small amount of rice between your fingers to check for any remaining starch. The rice should feel slightly sticky but not overly so.
- Quality Assurance: Properly washed sushi rice guarantees a superior sushi-making experience with the perfect balance of stickiness and firmness.
Seasoning Sushi Rice
Mastering the Art of Seasoning Sushi Rice: A Comprehensive Guide
Seasoning sushi rice is a vital step in creating authentic and delicious sushi. Whether you're a novice sushi chef or a seasoned pro, this detailed guide will walk you through the process of achieving perfectly seasoned sushi rice that enhances the overall flavor profile of your sushi dishes.
For Beginners: Getting Started with Sushi Rice Seasoning
Understanding the Ingredients
- Rice Vinegar: Ensure you use pure rice vinegar for the best results. It provides the distinct tanginess that balances the sweetness of the rice.
- Sugar: Adds a subtle sweetness to the rice, enhancing its overall taste.
- Salt: Balances the flavors and brings out the umami notes in the sushi rice.
Mixing the Seasoning
- Ratio: Follow the traditional ratio of 1 part rice vinegar to 3 parts sugar and 3 parts salt for a well-balanced flavor profile.
- Dissolving: Gentle heating is key to fully dissolve the sugar and salt in the rice vinegar, ensuring even distribution of flavors throughout the rice.
Seasoning Technique
- Folding Method: Once the sushi rice is cooked, gently fold in the seasoning mixture using a wooden spatula. Avoid stirring vigorously to prevent crushing the rice grains.
- Cooling Process: Allow the seasoned rice to cool to room temperature before using it for sushi preparation. This helps the flavors to meld together.
For Intermediate Cooks: Elevating Your Sushi Rice Flavor
Adjusting Sweetness and Tanginess
- Personalization: Taste the seasoned rice and adjust the sweetness and tanginess levels to suit your palate. You can add a touch more sugar for a sweeter rice or a dash of vinegar for a tangier kick.
Experimenting with Variations
- Adding Mirin: For a slightly sweeter and more complex flavor, consider adding a splash of mirin to the seasoning mixture.
- Incorporating Kombu: Infuse the rice vinegar with a small piece of dried kombu for a subtle umami undertone in the sushi rice.
Storage Tips
- Use Quickly: Seasoned sushi rice is best used within the same day for optimal freshness and flavor.
- Refrigeration: If you need to store the seasoned rice, cover it with a damp cloth and store it in an airtight container in the refrigerator. Let it come to room temperature before using it in sushi.
Conclusion
Elevating Your Sushi Game with a Rice Cooker
As a sushi enthusiast and home cook, my journey with sushi rice and rice cookers has been nothing short of transformative. Let me take you through my personal experiences and insights that have elevated my sushi-making game, making it not just a meal but a culinary adventure that I look forward to time and time again.
The Perfect Sushi Rice Every Time
When I first ventured into making sushi at home, I was skeptical about using a rice cooker for sushi rice. However, after thorough research and experimentation, I can confidently say that a rice cooker is a game-changer. The precise settings and consistent heat of the rice cooker ensure that the sushi rice turns out perfectly cooked every single time. The fluffy, slightly sticky texture is exactly what you need for those picture-perfect sushi rolls.
Convenience and Ease of Use
Gone are the days of constantly monitoring a pot on the stove to get the rice just right. With a rice cooker, you simply add the rice and water, press a button, and let the magic happen. This hands-off approach not only saves time but also guarantees consistent results. It's a stress-free way to cook sushi rice, allowing you to focus on perfecting your sushi-making techniques rather than babysitting a pot.
Customization for Your Taste Preferences
One of the things I love most about using a rice cooker for sushi rice is the ability to customize it to suit my taste preferences. Whether you like your rice slightly firmer or softer, a rice cooker allows you to adjust the water-to-rice ratio to achieve the perfect consistency. You can also experiment with different types of rice, like short-grain or medium-grain, to find the texture that you enjoy the most in your sushi.
Anecdotes from the Kitchen
I vividly remember the first time I tried making sushi rice in a rice cooker for a dinner party with friends. The compliments and empty plates at the end of the night spoke volumes about the success of using a rice cooker for sushi rice. It was a proud moment for me, knowing that I'd created a delicious and authentic sushi experience right in my own kitchen.
Embracing the Art of Sushi Making
Using a rice cooker for sushi rice hasn't only simplified the cooking process but has also deepened my appreciation for the art of sushi making. The attention to detail, from washing the rice to seasoning it with vinegar and sugar, is where the magic happens. The rice cooker serves as a reliable partner in this culinary journey, ensuring that the foundation of your sushi rolls is nothing short of perfection.
In conclusion, if you're a sushi lover like me, using a rice cooker for sushi rice is a game-changer that will elevate your sushi-making experience to new heights. The convenience, consistency, and customization options make it a must-have tool in your kitchen arsenal. So go ahead, give it a try, and embark on a sushi-making adventure that will leave you craving homemade sushi on a regular basis. Trust me, once you go the rice cooker route for sushi rice, there's no turning back!