Mastering the Art of Beating Rice for Sushi: A Step-by-Step Guide
Beating sushi rice is a fundamental step that can make a significant difference in the texture, consistency, and overall flavor of your sushi. Whether you're a novice sushi enthusiast or a seasoned sushi chef, understanding the techniques involved in beating rice is essential for creating perfect sushi rolls. Let's dive into the details of this process and explore how you can elevate your sushi-making skills to new heights.
For Beginners: Getting Started with the Basics
Choosing the Right Rice
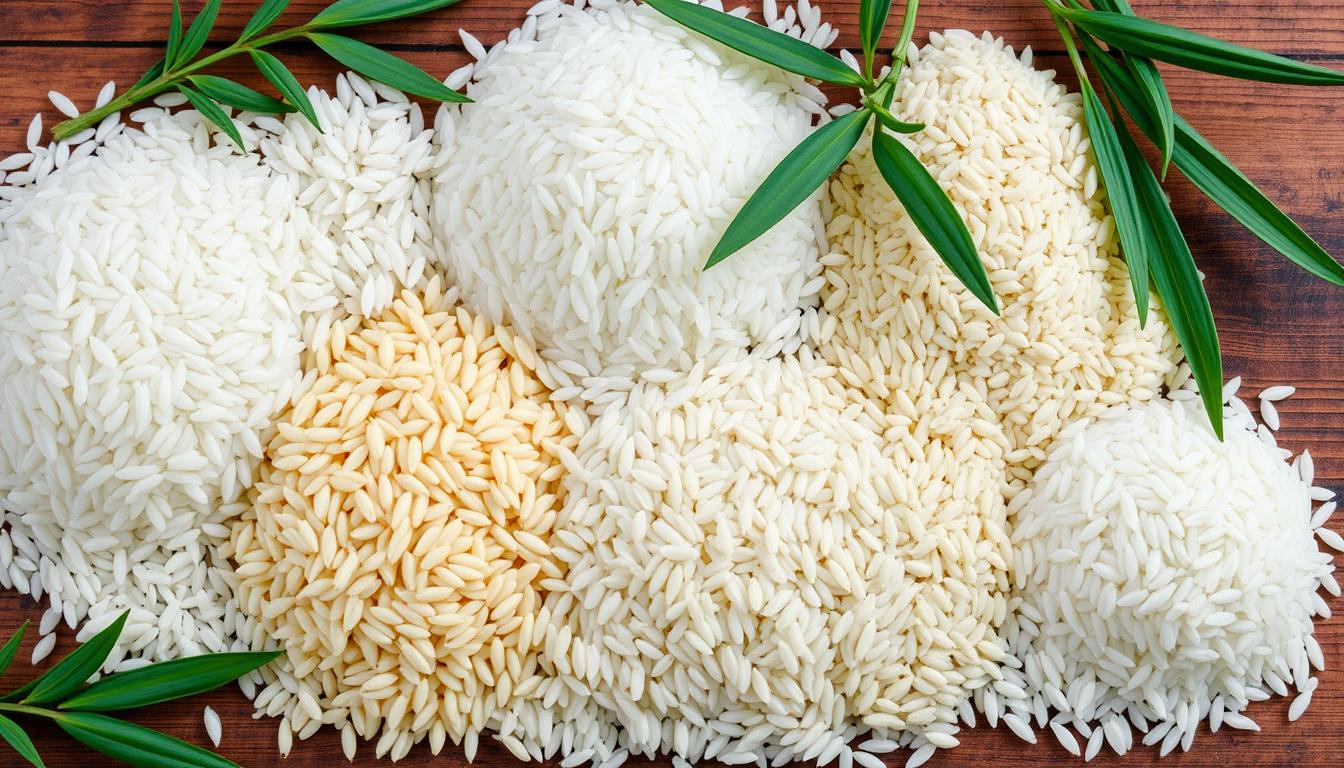
- Sushi Rice: Use high-quality short-grain Japanese rice specifically labeled as sushi rice for the best results. This type of rice has the perfect balance of stickiness and texture required for sushi.
Washing and Rinsing
- Washing Technique: Place the rice in a bowl and cover it with cold water. Gently swish the rice around with your fingers to remove excess starch. Repeat this process until the water runs clear.
- Rinsing Method: Drain the rice using a fine-mesh sieve to remove the cloudy water. Rinse the rice under cold running water while gently agitating it with your hand.
Cooking the Rice
- Water Ratio: Use a 1:1 ratio of water to rice for sushi rice. Cook the rice in a rice cooker or on the stovetop according to the package instructions.
- Seasoning: After the rice is cooked, mix in a combination of rice vinegar, sugar, and salt to create the seasoned sushi rice.
For Intermediate Cooks: Enhancing the Flavor and Texture
Beating the Rice
- Tools Needed: Use a wooden hangiri (sushi rice mixing tub) and a shamoji (rice paddle) for the beating process.
- Technique: Transfer the cooked rice to the hangiri, and gently fold in the seasoned vinegar mixture using a cutting motion with the shamoji. Avoid mashing or stirring vigorously to prevent crushing the rice grains.
Achieving the Desired Texture
- Consistency: Aim for a glossy and sticky texture that holds together well but is not overly mushy.
- Cooling Process: Fan the rice while mixing to help it cool down and absorb the seasoning evenly.
For Experts: Advanced Techniques and Tips for Perfection
Mastering the Timing
- Timing is Key: Beat the rice while it's still warm to allow the seasoning to be absorbed effectively.
- Practice Patience: Take your time to ensure each grain is coated evenly with the seasoning for a well-balanced flavor profile.
Experimenting with Flavors
- Customization: Consider adding ingredients like sesame seeds, furikake, or finely chopped nori for added flavor and visual appeal.
- Temperature Control: Maintain the ideal temperature of the rice by covering it with a damp cloth to prevent it from drying out while you prepare your sushi rolls.
By mastering the art of beating rice for sushi, you can elevate your sushi-making skills and create delicious, authentic sushi rolls that rival those made in top sushi restaurants. Practice, patience, and attention to detail are key to achieving the perfect sushi rice consistency every time.
Key Takeaways
- Beating sushi rice is crucial for texture and flavor enhancement.
- Proper beating ensures perfect sushi rolls and authentic taste.
- Use the right tools and techniques for consistent results.
- Avoid common mistakes like incorrect rice type and seasoning imbalance.
Importance of Beating Sushi Rice
Mastering the Art of Beating Sushi Rice: A Step-by-Step Guide
Beating sushi rice is a fundamental step in creating delicious homemade sushi that's packed with flavor and has the perfect texture. Whether you're a novice sushi chef or an experienced home cook looking to elevate your sushi game, mastering the art of beating sushi rice is key. This detailed guide will walk you through the process, from the basics to advanced techniques, ensuring that your sushi rice is top-notch every time.
For Beginners: Getting Started
1. Choosing the Right Rice
- Short-Grain Rice: Opt for high-quality Japanese short-grain rice, such as Koshihikari or Calrose, for the best results in sushi making.
2. Washing the Rice
- Rinsing: Place the rice in a bowl and cover it with water. Gently swish the rice around with your fingers to remove excess starch. Repeat this process 3-4 times until the water runs clear.
3. Cooking the Rice
- Water Ratio: Use a 1:1 ratio of rice to water for sushi rice. Cook the rice in a rice cooker or on the stovetop until it's tender and sticky.
For Intermediate Cooks: Perfecting the Technique
1. Making the Vinegar Mixture
- Ingredients: Combine rice vinegar, sugar, and salt in a small saucepan. Heat the mixture until the sugar and salt dissolve. Let it cool before using.
2. Mixing the Rice and Vinegar
- Wooden Hangiri Bowl: Transfer the cooked rice to a wooden hangiri bowl. Gradually pour the vinegar mixture over the rice while using a cutting motion to combine them.
3. Beating the Rice
- Folding Technique: Use a flat wooden or plastic paddle to gently fold the rice while fanning it to help cool it down. Aim for a slicing and folding motion to evenly distribute the vinegar mixture.
For Advanced Chefs: Fine-Tuning Your Skills
1. Testing for Consistency
- Taste Test: Take a small portion of the rice and taste it to ensure the vinegar flavor is well-balanced. Adjust the seasoning if needed.
2. Achieving the Perfect Texture
- Texture Check: The rice should be glossy and sticky but still retain individual grains. Avoid overmixing, as it can lead to mushy rice.
3. Storage Tips
- Covering the Rice: To prevent the rice from drying out, cover it with a damp cloth while you prepare your sushi ingredients.
Tools Needed for Beating Rice
Mastering the Art of Beating Sushi Rice: A Complete Guide
Achieving the perfect sushi rice texture and flavor requires the right tools and techniques. Whether you're a novice sushi chef or a seasoned pro, mastering the art of beating sushi rice is essential for creating delicious and authentic sushi. This comprehensive guide will take you through the process step by step, ensuring that your sushi rice turns out perfectly every time.
For Beginners: Getting Started
Selecting the Right Tools
- Wooden Hangiri: Invest in a traditional wooden hangiri, a flat-bottomed tub specifically designed for mixing sushi rice. This tool allows for gentle mixing without crushing the delicate rice grains.
- Shamoji Paddle: Use a shamoji, a wooden paddle, to mix the sushi vinegar or rice seasoning into the rice. This tool is crucial for evenly distributing the vinegar seasoning throughout the rice.
Preparing the Rice
- Cooking: Cook your sushi rice according to the package instructions or using a rice cooker for convenience. Make sure to use the correct ratio of water to rice to achieve the perfect texture.
- Cooling: Spread the cooked rice in the wooden hangiri to cool it down slightly before seasoning. This step helps the rice absorb the vinegar seasoning evenly.
For Intermediate Cooks: Enhancing the Flavor
Mixing the Seasoning
- Vinegar Seasoning: Prepare your sushi vinegar seasoning by combining rice vinegar, sugar, and salt. Gently heat the mixture to dissolve the sugar and salt before adding it to the rice.
- Mixing Technique: Use a cutting and folding motion with the shamoji paddle to mix the vinegar seasoning into the rice. Avoid stirring vigorously to prevent crushing the rice grains.
Testing for Consistency
- Taste Test: Before adding all the seasoning, take a small portion of rice and taste it to adjust the flavor. The sushi rice should have a balance of sweetness, acidity, and saltiness.
- Texture Check: The rice should be glossy and slightly sticky, with each grain coated evenly with the vinegar seasoning. Adjust the seasoning if necessary to achieve the desired texture.
For Advanced Chefs: Perfecting the Technique
Fine-tuning the Process
- Resting Time: Allow the seasoned sushi rice to rest for 10-15 minutes to let the flavors meld together. This resting period enhances the overall taste of the sushi rice.
- Consistency: Aim for a consistent texture and flavor throughout the entire batch of sushi rice. Pay attention to details and adjust the seasoning as needed for uniformity.
Presentation Tips
- Serving Style: Consider the presentation of your sushi rice, whether you're making nigiri, rolls, or bowls. Each style may require slight adjustments in texture and seasoning for the best results.
- Garnishes: Enhance the visual appeal of your sushi rice with garnishes like sesame seeds, nori strips, or thinly sliced vegetables. These extra touches can elevate the overall dining experience.
Technique for Beating Sushi Rice
Mastering the Technique of Mixing Sushi Vinegar into Rice
Learning how to gently mix sushi vinegar into cooked rice is a crucial skill for creating delicious and authentic sushi at home. Whether you're a beginner looking to perfect your sushi rice or an experienced sushi chef aiming for consistency, mastering this technique is key. Let's dive into the detailed steps to achieve the ideal texture and stickiness for your sushi rice.
For Beginners: Getting Started
Preparing the Rice
- Cooking Rice: Start by cooking short-grain sushi rice according to the package instructions. It's essential to use the right type of rice to achieve the desired sticky texture.
- Cooling the Rice: Once the rice is cooked, transfer it to a large, shallow container or hangiri (wooden sushi rice tub) to cool down slightly before mixing in the vinegar.
Mixing Technique
- Cutting and Folding: Use a rice paddle or spatula to cut through the rice in a gentle folding motion. This technique helps evenly distribute the sushi vinegar without crushing the grains.
- Fan the Rice: While mixing, have a fan or a piece of cardboard handy to gently fan the rice. This helps cool the rice quickly and gives it a glossy finish.
Vinegar Incorporation
- Add Vinegar Gradually: Pour the sushi vinegar over the rice in a gentle, steady stream. Divide the vinegar into a few additions to ensure even distribution.
- Mixing Time: Avoid overmixing the rice. Aim to mix the vinegar into the rice within 1-2 minutes to prevent it from becoming too mushy.
For Intermediate to Advanced Users: Fine-Tuning Your Technique
Seasoning Adjustment
- Taste Test: After mixing in the vinegar, take a small portion of rice and taste it. Adjust the seasoning by adding more vinegar, sugar, or salt according to your preference.
- Resting Time: Allow the seasoned rice to rest for about 10-15 minutes. This helps the flavors meld together and improves the overall taste of the sushi rice.
Texture Control
- Sushi Rice Texture: The ideal sushi rice should be sticky enough to hold together but not overly wet. Adjust the mixing technique and vinegar quantity to achieve the desired texture.
- Moisture Balance: If the rice feels too dry, lightly moisten your hands with water and gently mix the rice to redistribute the moisture.
Troubleshooting Tips
- Sticky Rice: If the rice is too sticky, try adding a bit of water and gently mix it in. This can help loosen up the grains without compromising the flavor.
- Soggy Rice: To fix soggy rice, spread it out on a flat surface and let it air out for a few minutes. Gently fluff the rice with a fork to help it dry out.
Common Mistakes to Avoid
Mastering the Art of Perfect Sushi Rice: Common Mistakes to Avoid
Creating the perfect sushi rice is an essential skill for any sushi enthusiast, and avoiding common mistakes during the mixing process is key to achieving that ideal texture and flavor. Whether you're a novice sushi chef or a seasoned pro, paying attention to these details can elevate your sushi game to new heights.
For Beginners: Getting Started on the Right Foot
Choosing the Correct Rice
- Selecting the Right Type: Opt for short-grain rice specifically labeled as sushi rice to ensure the proper starch content for that signature sticky texture.
- Avoiding Long-Grain Varieties: Long-grain rice lacks the necessary stickiness for sushi rice, so it's best to stick to short-grain options.
Rinsing and Soaking
- Thorough Washing: Rinse the rice until the water runs clear to remove excess starch, which can make the rice too sticky.
- Soaking Time: Don't skip the soaking step before cooking, as it ensures even water absorption for perfectly cooked rice.
For Intermediate Cooks: Fine-Tuning Your Technique
Handling Starch Content
- Balancing Starch Levels: Be mindful of the starch content in your rice. Too much starch can result in overly sticky rice, while too little can lead to a dry, unappealing texture.
- Testing for Stickiness: After cooking, gently fluff the rice to check for the desired level of stickiness. Adjust your rinsing and soaking techniques accordingly.
Seasoning Perfection
- Balancing Flavors: Use sushi vinegar sparingly when seasoning your rice to avoid overpowering its delicate taste. Start with a small amount and taste as you go.
- Adding Umami: Consider incorporating ingredients like kombu (dried kelp) or mirin to enhance the savory umami flavor of your sushi rice.
For Advanced Chefs: Elevating Your Sushi Game
Temperature Control
- Cooling Techniques: After cooking, spread the rice out in a shallow container and fan it to cool it quickly. This helps maintain the ideal texture and prevents overcooking.
- Avoiding Refrigeration: While storing leftover sushi rice is common, refrigeration can alter its texture. Opt for room temperature storage if possible.
Texture Mastery
- Perfecting Grain Separation: Use a gentle folding motion when mixing in the seasoning to avoid crushing the rice grains. This technique helps maintain a distinct, fluffy texture.
- Experimenting with Texture: Consider mixing in toasted sesame seeds or furikake seasoning for added texture and flavor complexity.
Benefits of Properly Beating Rice
Mastering the Art of Beating Sushi Rice: A Comprehensive Guide
Beating sushi rice is a critical step in the sushi-making process that significantly impacts the flavor, texture, and overall presentation of your sushi dishes. Whether you're a novice sushi enthusiast or a seasoned sushi chef, mastering the art of beating sushi rice is essential for creating authentic and delicious sushi experiences. This comprehensive guide will take you through the detailed steps and techniques to ensure that you achieve perfect sushi rice every time.
For Beginners: Getting Started
Selecting the Right Rice
- Short-Grain Rice: Opt for high-quality short-grain Japanese rice, such as Japonica or Calrose, specifically designed for sushi making. These rice varieties have the ideal starch content for creating sticky sushi rice.
Washing and Rinsing
- Rinsing: Rinse the rice under cold water in a fine-mesh strainer to remove excess starch. Gently swish the rice around with your fingers until the water runs clear to prevent the rice from becoming too sticky.
Cooking the Rice
- Water Ratio: Use the appropriate water-to-rice ratio recommended for sushi rice. Typically, it's around 1:1 water to rice, but check the specific instructions on your rice package for accuracy.
- Cooking Method: Cook the rice in a rice cooker or on the stovetop according to the instructions. Once cooked, allow the rice to rest and steam for an additional 10-15 minutes to achieve the perfect texture.
For Intermediate Cooks: Perfecting the Technique
Mixing the Vinegar Seasoning
- Ingredients: Combine rice vinegar, sugar, and salt in a small saucepan over low heat. Stir the mixture until the sugar and salt dissolve completely. Allow it to cool before using it to season the rice.
- Seasoning Technique: Gently fold the vinegar seasoning into the cooked rice using a wooden or plastic paddle. Avoid stirring vigorously to prevent crushing the rice grains.
Beating the Rice
- Traditional Hangiri Method: Transfer the seasoned rice to a wooden hangiri (sushi rice mixing tub) for beating. Using a paddle, gently and steadily 'cut' and 'fold' the rice in a horizontal motion to distribute the vinegar seasoning evenly.
- Hand Fan Technique: While beating the rice, have a hand fan ready to cool the rice and remove excess moisture, helping to achieve the desired glossy sheen and sticky consistency.
For Advanced Chefs: Fine-Tuning Your Skills
Texture and Consistency
- Testing the Texture: To check the rice's consistency, press a small amount of rice between your fingers. It should hold together without being too mushy or too firm, indicating the perfect sticky texture for sushi.
- Adjusting Seasoning: Taste a small portion of the rice and adjust the seasoning if necessary by adding more vinegar, sugar, or salt to achieve a balanced flavor profile.
Presentation and Serving
- Molding Sushi Rolls: Use the beaten sushi rice to mold traditional sushi rolls, nigiri, or sashimi. The sticky consistency of the rice will help the ingredients adhere together and maintain their shape.
- Serving Tips: Serve your beautifully crafted sushi dishes with pickled ginger, wasabi, and soy sauce for a complete sushi experience that delights both the eyes and taste buds.
Conclusion
The Art of Beating Rice for Perfect Sushi
As a sushi enthusiast and home cook who's delved deep into the world of Japanese cuisine, I can attest to the importance of mastering the art of beating sushi rice. It isn't just a step in sushi-making; it's a crucial technique that can elevate your sushi from good to exceptional. Allow me to share some personal experiences, tips, and insights that have helped me perfect my sushi rice and create mouthwatering sushi dishes that impress even the most discerning sushi lovers.
The Rhythmic Dance of the Rice Paddle
When I first started making sushi at home, I underestimated the significance of beating the rice. It wasn't until I invested time in researching traditional sushi-making techniques that I realized the rhythmic dance of the rice paddle against the cooked rice grains is what gives sushi rice its signature texture and glossy sheen. I found that using quick, gentle strokes in a folding motion helps distribute the seasoned vinegar evenly without crushing the grains, resulting in perfectly seasoned sushi rice that holds up well when shaped into sushi rolls or nigiri.
The Zen of Patience and Practice
Like any culinary art, mastering the art of beating sushi rice requires patience and practice. I remember my early attempts where my rice was either too mushy or too firm, lacking the delicate balance of sweetness, acidity, and stickiness that defines authentic sushi rice. Through trial and error, I honed my technique, adjusting the pressure and speed of my paddle strokes until I achieved that elusive perfect consistency. It was a journey of discovery and growth that deepened my appreciation for the craftsmanship behind every sushi bite.
Elevating Your Sushi Game with Seasoning Secrets
Beyond the physical act of beating the rice, the choice of seasoning plays a pivotal role in enhancing the flavor profile of your sushi. Experimenting with different brands of rice vinegar, sugar, and salt allowed me to tailor the seasoning to my preference, whether I desired a slightly tangy rice for sashimi or a sweeter rice for maki rolls. I discovered that adding a touch of mirin or kombu to the seasoning mixture can impart subtle umami notes that elevate the overall taste of the sushi, creating a harmonious balance of flavors that dance on the palate.
The Joy of Sharing Sushi-Making Moments
One of the most rewarding aspects of perfecting the art of beating sushi rice is the joy of sharing it with others. Hosting sushi-making nights with friends and family became a cherished tradition where we bonded over rolling sushi, sharing stories, and savoring the fruits of our labor. Seeing the delight on their faces as they tasted the sushi made with love and attention to detail fueled my passion for sushi-making and inspired me to continue refining my skills.
Embracing the Imperfect Perfection of Homemade Sushi
In the world of sushi, perfection is an ideal that we strive towards but never truly attain. Each grain of rice, each slice of fish, bears the imprint of our hands and hearts, making every sushi creation a unique expression of our culinary journey. Embracing the imperfections, the lopsided rolls, the uneven rice distribution, is part of the beauty of homemade sushi. It's a reminder that behind every sushi masterpiece lies a story of effort, passion, and a desire to create something special.
In conclusion, beating sushi rice isn't just a technique; it's a labor of love that transforms humble ingredients into exquisite bites of culinary art. By infusing your sushi-making process with patience, practice, and a dash of creativity, you can elevate your sushi game and create memorable dining experiences for yourself and your loved ones. So, the next time you embark on a sushi-making adventure, remember to embrace the art of beating rice and savor the delicious rewards it brings. Happy sushi-making, fellow food enthusiasts!